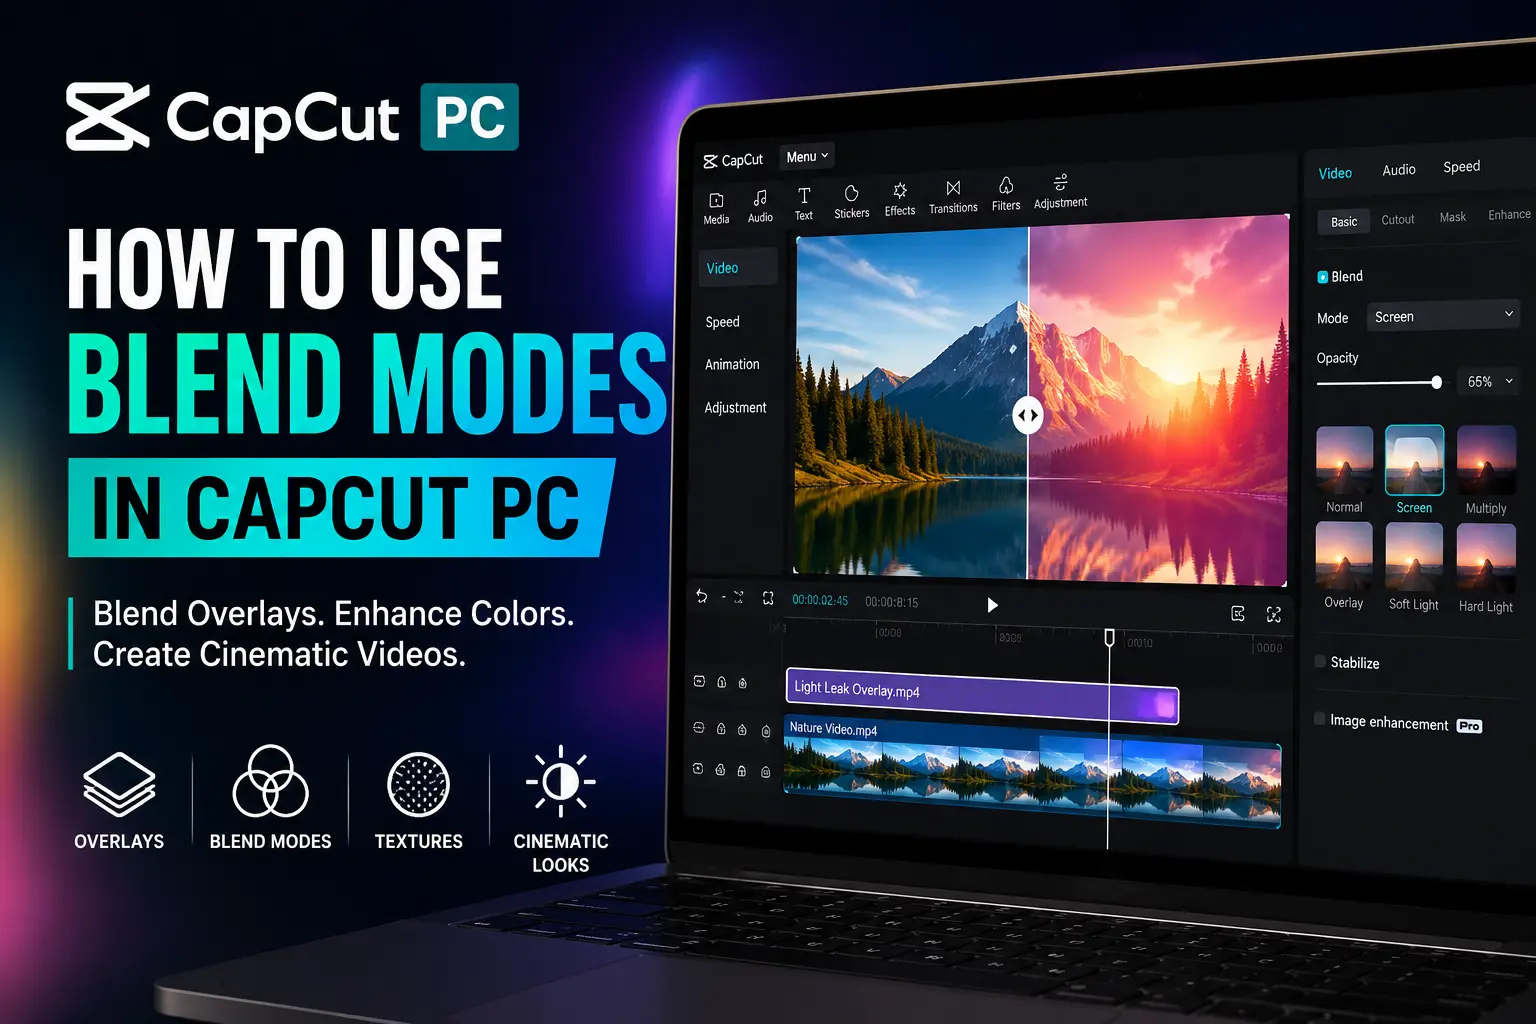
Blend Modes in CapCut PC let you control how an overlay interacts with the video or image beneath it. By choosing the right blend mode, you can create effects like light leaks, double exposure, smoke overlays, cinematic lighting, and textured backgrounds without using advanced editing software. This guide explains how to use Blend Modes in CapCut PC, what each mode does, and how to get the best results for your videos.
🎨 What Are Blend Modes in CapCut PC?
Before applying Blend Modes, it’s important to understand what they do and when to use them. Once you know how they work, you can create more professional looking videos and choose the right effect for each project.
🖼️ What Is a Blend Mode?
A Blend Mode is an editing feature that changes how an overlay combines with the layer beneath it. Instead of displaying the overlay normally, CapCut blends its colors, brightness, and contrast with the main video to produce different visual effects.
Blend Modes are commonly used with:
- Video overlays
- PNG images
- Light leak effects
- Smoke and fire overlays
- Texture graphics
- Logos and watermarks
Because the overlay stays on a separate timeline layer, you can experiment with different Blend Modes without changing the original video.
⚙️ How Do Blend Modes Work?
Every Blend Mode uses a different method to combine the pixels of the overlay with those of the background layer. Some modes make the image brighter, while others darken it or increase contrast.
For example:
- Screen brightens the image and works well with light leaks or glowing effects.
- Multiply darkens the scene, making it useful for shadows and texture overlays.
- Overlay increases contrast while preserving highlights and shadows.
- Soft Light creates a subtle, cinematic look with gentle contrast.
The final result depends on both the selected Blend Mode and the colors in your overlay and background footage.
🎬 When Should You Use Blend Modes?
Blend Modes are useful whenever you want an overlay to blend naturally into your video instead of sitting on top of it.
Some popular use cases include:
- Creating realistic light leak effects.
- Blending smoke, fog, or fire overlays.
- Making double exposure videos.
- Adding paper, dust, or film grain textures.
- Improving the look of motion graphics.
- Creating cinematic color and lighting effects.
- Removing black or bright backgrounds from certain overlay clips.
Using the right Blend Mode can make simple overlays look more natural and help your edits appear more polished without adding unnecessary effects.
💻 Before You Start
Before applying Blend Modes in CapCut PC, make sure your project is set up correctly. A few simple preparation steps will help you apply blend effects smoothly and avoid common editing issues.
🔄 Update CapCut PC
Start by using the latest version of CapCut PC. Updates often include new features, performance improvements, and interface changes that can affect where the Blend option appears.
If you can’t find a Blend Mode shown in this guide, check whether your version of CapCut is up to date. The interface may also vary slightly between Windows and macOS.
📥 Import Your Main Video
Open CapCut PC and create a new project.
Then:
- Click Import.
- Select the main video from your computer.
- Drag it onto the primary timeline track.
This video will serve as the base layer for your blend effects.
🖼️ Add an Overlay Layer
Next, import the media you want to blend with your main video.
Your overlay can be:
- A video clip
- A PNG image
- A light leak effect
- Smoke or fire footage
- A texture overlay
- A logo or watermark
Drag the overlay onto a track above the main video. Blend Modes only work when there are at least two layers to combine.
✅ Select the Correct Overlay Clip
Click the overlay on the timeline before opening the editing tools.
Make sure:
- The overlay clip is highlighted.
- The main video isn’t selected.
- The overlay is on a separate track.
If the wrong clip is selected, the Blend option may not appear or the effect won’t be applied to the intended layer.
⚙️ Open the Editing Panel
With the overlay selected, the editing panel will display the available settings for that clip.
From here, you’ll be able to access tools such as:
- Blend
- Opacity
- Animations
- Effects
- Transform
- Color adjustments
The exact location of the Blend option may differ slightly depending on your CapCut version, but it is available only after selecting a supported overlay.
Once your project is prepared, you’re ready to apply Blend Modes and create professional looking visual effects in just a few clicks.
✨ How to Use Blend Modes in CapCut PC
Once your project is set up, applying Blend Modes in CapCut PC is quick and straightforward. Follow these steps to blend an overlay with your main video and create professional looking visual effects.
📂 Step 1: Open Your Project
Launch CapCut PC and open the project where you want to use a Blend Mode.
If you’re starting a new project:
- Create a new project.
- Import your main video.
- Add the overlay you want to blend.
Ensure both clips are visible on the timeline before continuing.
📥 Step 2: Import an Overlay
Blend Modes require an overlay, so import the media you want to combine with your video.
Common overlay types include:
- Light leaks
- Smoke or fog effects
- Fire overlays
- Film grain
- Dust particles
- PNG graphics
- Texture images
Choose an overlay that complements your video’s style for the best results.
🎞️ Step 3: Place the Overlay Above the Main Video
Drag the overlay onto a track above your primary video.
Your timeline should look similar to this:
| Track | Content |
|---|---|
| Track 2 | Overlay (video, image, or effect) |
| Track 1 | Main video |
Blend Modes work by combining the upper layer with the layer below it.
🖱️ Step 4: Select the Overlay
Click the overlay clip in the timeline.
When selected, the editing panel will display settings specific to that overlay, including the Blend option.
If the main video is selected instead, CapCut won’t apply the Blend Mode to the overlay.
🎨 Step 5: Open the Blend Menu
In the editing panel, locate and open the Blend section.
CapCut will display a list of available Blend Modes. You can preview each one by selecting it to see how it changes the appearance of your overlay.
Try different modes to find the effect that best suits your footage.
🌈 Step 6: Choose a Blend Mode
Each Blend Mode creates a different visual result.
Some commonly used Blend Modes include:
- Normal – Displays the overlay without blending.
- Screen – Brightens the image and works well for light leaks.
- Multiply – Darkens the image and enhances shadows.
- Overlay – Increases contrast while preserving detail.
- Soft Light – Produces a smooth, cinematic effect.
- Hard Light – Creates stronger contrast and dramatic lighting.
- Darken – Keeps the darker parts of the overlay.
- Lighten – Keeps the brighter parts of the overlay.
Preview each option before deciding which one fits your project.
🔍 Step 7: Adjust Opacity
After selecting a Blend Mode, fine tune the result by adjusting the Opacity slider.
Lower opacity creates a softer, more natural blend, while higher opacity makes the effect more noticeable.
Finding the right balance helps the overlay blend smoothly without overpowering the main video.
▶️ Step 8: Preview and Export
Play your video from beginning to end to ensure the Blend Mode looks consistent throughout the project.
Before exporting, check that:
- The overlay blends naturally.
- Brightness and contrast look balanced.
- The effect appears at the correct time.
- No unwanted artifacts or harsh edges are visible.
If needed, switch to another Blend Mode or adjust the opacity until you’re satisfied with the result.
Once everything looks right, export your video using your preferred resolution and frame rate.
With these steps, you can use Blend Modes in CapCut PC to create everything from subtle lighting effects to eye catching cinematic visuals without relying on advanced editing software.
🎭 Common Blend Modes Explained
Choosing the right Blend Mode can dramatically change the look of your video. Each mode blends the overlay with the background differently, making some better for bright effects and others ideal for shadows, textures, or cinematic edits.
The table below explains the most commonly used Blend Modes in CapCut PC and when to use them.
| Blend Mode | Best For | Effect |
|---|---|---|
| Normal | Standard overlays | Displays the overlay without blending. |
| Screen | Light leaks, lens flares, fireworks | Brightens the image by removing darker areas. |
| Multiply | Shadows, textures, paper effects | Darkens the image and adds depth. |
| Overlay | Cinematic videos, color enhancement | Increases contrast while preserving highlights and shadows. |
| Soft Light | Portraits, lifestyle videos | Adds gentle contrast for a natural, cinematic look. |
| Hard Light | Dramatic scenes, bold graphics | Produces stronger contrast and more intense lighting. |
| Darken | Removing white or bright backgrounds | Keeps darker pixels while reducing lighter areas. |
| Lighten | Removing black backgrounds | Keeps brighter pixels while hiding darker areas. |
🌟 Screen
Screen is one of the most popular Blend Modes because it works exceptionally well with bright overlays.
It’s commonly used for:
- Light leaks
- Lens flares
- Fireworks
- Sparkles
- Glowing particles
Dark backgrounds become less noticeable, allowing the bright parts of the overlay to blend naturally into the video.
🌑 Multiply
Multiply combines darker colors, making it ideal for adding depth and texture.
Use it for:
- Paper textures
- Dust overlays
- Shadow effects
- Vintage film looks
Because it darkens the underlying footage, it’s best used on brighter videos.
🎬 Overlay
Overlay increases both contrast and color richness without completely changing the original footage.
It’s a great choice for:
- Travel videos
- Cinematic edits
- Promotional content
- Social media reels
This mode creates a balanced blend that enhances visuals while keeping important details visible.
🌤️ Soft Light
If you want a subtle enhancement, Soft Light is an excellent option.
It works well for:
- Lifestyle videos
- Wedding films
- Interviews
- Product showcases
The effect is smooth and natural, making it one of the safest Blend Modes for beginners.
⚡ Hard Light
Hard Light creates a much stronger visual effect than Soft Light.
It’s suitable for:
- Music videos
- Action scenes
- Gaming edits
- High energy promotional videos
Since the effect is more intense, adjust the Opacity slider if the result appears too harsh.
💡 Which Blend Mode Should You Choose?
The best Blend Mode depends on the type of overlay you’re using and the look you want to achieve.
Here’s a quick reference:
- Light leaks: Screen
- Smoke or fog: Screen or Lighten
- Paper textures: Multiply
- Film grain: Overlay or Soft Light
- Cinematic color enhancement: Overlay
- Subtle lighting: Soft Light
- Bold visual effects: Hard Light
Don’t hesitate to test multiple Blend Modes on the same overlay. Even a small change can produce a completely different result, and previewing each option is the easiest way to find the best match for your footage.
🎬 Best Uses for Blend Modes
Blend Modes in CapCut PC are more than just visual effects. They help you combine overlays naturally with your footage, making your videos look cleaner, more creative, and more professional. Here are some of the most effective ways to use them.
✨ Create Light Leak Effects
Light leaks add warmth and cinematic style to your videos. Instead of covering the footage, use the Screen blend mode to blend the bright areas while hiding the dark background.
This technique works well for:
- Travel videos
- Vlogs
- Wedding films
- Cinematic montages
🌫️ Blend Smoke and Fire Overlays
Smoke, fog, and fire effects look much more realistic when blended correctly.
For these overlays, try:
- Screen for bright smoke or fire
- Lighten to remove dark backgrounds
- Overlay for subtle atmospheric effects
Always preview the result and adjust the opacity if the effect appears too strong.
🖼️ Create a Double Exposure Effect
A double exposure combines two images or videos into a single creative composition.
To achieve this effect:
- Place the second video above the first.
- Apply Screen, Overlay, or Soft Light.
- Adjust the opacity until both clips blend naturally.
This technique is popular for music videos, portraits, and artistic edits.
📄 Add Texture Overlays
Texture overlays give digital videos a more natural or vintage appearance.
Popular textures include:
- Film grain
- Dust particles
- Paper textures
- Scratches
- Bokeh effects
For most texture overlays, Multiply, Overlay, or Soft Light produce the best results.
🎥 Improve Cinematic Videos
Blend Modes can add depth and atmosphere without using complicated color grading tools.
Many creators use them to:
- Enhance lighting.
- Increase visual depth.
- Add subtle color effects.
- Create a film like appearance.
Using Overlay or Soft Light with a low opacity often delivers a clean, cinematic finish.
🎨 Enhance Motion Graphics
Graphics, logos, and animated elements don’t always need to appear as solid objects on the screen.
Applying the right Blend Mode can help them integrate more naturally with the background.
This is especially useful for:
- Lower thirds
- Animated logos
- Intro graphics
- Social media animations
- Promotional videos
Experimenting with different Blend Modes helps you find the most natural looking result for each design.
💡 Combine Blend Modes with Other Editing Tools
Blend Modes work even better when paired with other CapCut features.
For example, you can combine them with:
- Opacity for finer control.
- Keyframes to animate overlays.
- Color adjustments for better visual consistency.
- Animations to create smooth entrances and exits.
- Effects for more dynamic edits.
Using these tools together gives you greater creative control and helps your videos stand out without making them look over edited.
Blend Modes are most effective when used with purpose. Rather than applying them to every overlay, choose the mode that best supports your video’s style and enhances the overall viewing experience.
Before applying Blend Modes, learn How to Splice an Overlay in CapCut PC to split and edit overlay clips independently for greater control.
Visit our homepage to explore more CapCut tutorials and step by step guides for creating professional quality videos.
⚠️ Common Blend Mode Problems and Fixes
Most Blend Mode issues in CapCut PC are easy to resolve. Whether the Blend option is missing or the effect doesn’t look right, the solutions below can help you get back on track.
❌ Blend Mode Option Is Missing
If you can’t find the Blend option, the selected clip may not support it or the wrong layer is active.
Try these fixes:
- Select the overlay instead of the main video.
- Make sure the overlay is on a track above the main video.
- Update CapCut PC to the latest version.
- Reopen your project if the editing panel doesn’t load correctly.
🎞️ The Blend Mode Doesn’t Change Anything
If switching Blend Modes produces no visible effect, the overlay may not have enough contrast or transparency.
Check whether:
- The overlay is covering the main video.
- The overlay has a solid background.
- The selected Blend Mode matches the type of overlay.
- The Opacity is set too low.
Testing another Blend Mode often solves the problem.
☀️ The Video Looks Too Bright
Some Blend Modes, such as Screen, can make the image appear brighter than expected.
To balance the effect:
- Lower the overlay’s opacity.
- Try Soft Light instead of Screen.
- Use a darker overlay if needed.
A subtle adjustment usually creates a more natural result.
🌑 The Video Looks Too Dark
Modes like Multiply can darken the entire frame.
To fix this:
- Reduce the opacity.
- Switch to Overlay or Soft Light.
- Use a lighter overlay image or video.
Always preview the final result before exporting.
🖼️ The Overlay Covers the Entire Video
If the overlay hides the main footage, the Blend Mode may not be suitable for that type of media.
You can improve the result by:
- Trying Screen or Lighten for bright overlays.
- Reducing the opacity.
- Cropping or resizing the overlay.
- Using an overlay with a transparent background.
⚙️ The Blend Mode You Want Isn’t Available
CapCut features can vary between software versions, operating systems, and future updates.
If a specific Blend Mode isn’t listed:
- Update CapCut.
- Check whether you’re using CapCut PC rather than another version.
- Choose the closest available Blend Mode for a similar effect.
Interface changes don’t usually affect the core blending features.
🐢 CapCut Becomes Slow After Applying Blend Modes
High resolution overlays and multiple effects can increase processing time, especially on older computers.
To improve performance:
- Close unnecessary applications.
- Use lower resolution preview playback while editing.
- Limit the number of overlays playing simultaneously.
- Save your project regularly.
Performance during editing doesn’t always reflect the quality of the exported video.
✅ Quick Troubleshooting Checklist
Before assuming there’s a software issue, review these common fixes.
| Problem | Quick Solution |
|---|---|
| Blend option missing | Select the overlay clip and update CapCut. |
| No visible effect | Try another Blend Mode or increase opacity. |
| Video too bright | Lower opacity or use Soft Light. |
| Video too dark | Switch from Multiply to Overlay or Soft Light. |
| Overlay hides the video | Use Screen, Lighten, or a transparent overlay. |
| Slow editing performance | Reduce active overlays and close background apps. |
Most Blend Mode problems can be resolved by selecting the correct overlay, choosing a suitable Blend Mode, and adjusting the opacity. With a little experimentation, you’ll quickly find the settings that produce the best results for your project.
💡 Tips for Better Blend Mode Results
Using the right Blend Mode is only part of the process. These simple tips will help you create cleaner, more natural looking edits in CapCut PC.
🖼️ Use High Quality Overlays
Start with high resolution overlays whenever possible. Clear images and videos produce smoother blending and reduce visible artifacts or pixelation.
High quality overlays work best for:
- Light leaks
- Smoke and fog
- Film grain
- Fire effects
- Texture overlays
🎚️ Adjust Opacity After Choosing a Blend Mode
A Blend Mode may look too strong at full opacity. After selecting a mode, reduce or increase the Opacity until the overlay blends naturally with your footage.
Small adjustments often make a noticeable difference.
🔄 Test Multiple Blend Modes
There isn’t a single Blend Mode that’s best for every project. The final result depends on your overlay, lighting, and video colors.
Compare a few options—such as Screen, Overlay, Soft Light, and Multiply—before deciding which one works best.
🎯 Combine Blend Modes with Keyframes
Adding Keyframes lets you animate a blended overlay over time.
For example, you can:
- Fade an overlay in or out.
- Move a light leak across the screen.
- Gradually change the overlay’s position.
- Create smooth transitions between scenes.
This combination adds more movement and visual interest to your videos.
🎨 Fine Tune Colors and Brightness
After applying a Blend Mode, you may need to adjust the overlay or video to achieve a balanced look.
Consider making small changes to:
- Brightness
- Contrast
- Saturation
- Highlights
- Shadows
These adjustments help the overlay blend more naturally with the background.
👀 Preview Before Exporting
Always preview your video before exporting.
Check that:
- The Blend Mode looks consistent.
- The overlay isn’t too bright or too dark.
- Animations play smoothly.
- There are no unwanted visual distractions.
Watching the full project helps you catch issues that may not be obvious while editing.
📂 Keep Overlays Organized
If your project includes multiple overlays, organize them on separate timeline tracks.
This makes it easier to:
- Select the correct clip.
- Edit individual overlays.
- Apply different Blend Modes.
- Make changes without affecting other layers.
A clean timeline also speeds up your editing workflow.
⚖️ Use Blend Modes Sparingly
Blend Modes can enhance a video, but using too many at once may make the final result look cluttered.
Apply them only where they improve the scene or support the overall style of your project. Simple, well balanced edits often look more professional than effects heavy videos.
Following these tips will help you get more consistent results and make your Blend Modes in CapCut PC look polished, natural, and visually appealing.
⚖️ Blend Modes vs. Opacity: What’s the Difference?
Blend Modes and Opacity are often used together in CapCut PC, but they serve different purposes. Understanding how each tool works will help you create cleaner overlays and achieve the exact visual effect you want.
The table below highlights the key differences between Blend Modes and Opacity.
| Feature | Blend Modes | Opacity |
|---|---|---|
| Changes how layers interact | ✅ Yes | ❌ No |
| Controls transparency | ❌ No | ✅ Yes |
| Creates creative visual effects | ✅ Yes | ⚠️ Limited |
| Affects colors and brightness | ✅ Yes | ❌ No |
| Best for overlays and textures | ✅ Yes | ⚠️ Sometimes |
| Adjusts the strength of an effect | ❌ Indirectly | ✅ Yes |
🎨 What Do Blend Modes Do?
Blend Modes determine how the colors and brightness of an overlay combine with the layer beneath it.
They are ideal for creating effects such as:
- Light leaks
- Double exposure
- Smoke and fog
- Film grain
- Texture overlays
- Cinematic lighting
Changing the Blend Mode can completely transform the appearance of an overlay without editing the original media.
👁️ What Does Opacity Do?
Opacity controls how transparent or solid an overlay appears.
- 100% Opacity makes the overlay fully visible.
- 50% Opacity makes it partially transparent.
- 0% Opacity makes it invisible.
Unlike Blend Modes, changing the opacity doesn’t affect how colors interact—it only changes the overlay’s visibility.
🤝 When Should You Use Both Together?
For the best results, use Blend Modes and Opacity together.
A common workflow is:
- Apply a Blend Mode that matches your overlay.
- Reduce or increase the opacity.
- Preview the result.
- Make small adjustments until the overlay looks natural.
This approach gives you much more control than using either feature on its own.
💡 Which One Should You Use?
Choose the tool based on what you’re trying to achieve:
- Use Blend Modes to create creative lighting, texture, and cinematic effects.
- Use Opacity to control how strong or subtle the overlay appears.
- Combine both when you want a polished, professional looking result.
Understanding the difference between these two features makes it easier to edit overlays confidently and achieve better results in CapCut PC.
🎯 Conclusion
Using Blend Modes in CapCut PC is an easy way to create professional looking effects without advanced editing skills. By choosing the right Blend Mode and adjusting the opacity, you can blend overlays naturally, enhance your visuals, and give your videos a polished finish.
Experiment with different Blend Modes to see which works best for your project, and combine them with other CapCut tools to unlock even more creative possibilities.
❓ FAQs
If you’re new to Blend Modes in CapCut PC, these frequently asked questions can help you understand how they work and solve common editing issues.
Where can I find Blend Modes in CapCut PC?
Select your overlay clip on the timeline, then open the editing panel. The Blend option will appear if the selected media supports Blend Modes.
Which Blend Mode is best for light leaks?
Screen is the most commonly used Blend Mode for light leaks because it keeps the bright areas while reducing dark backgrounds.
Which Blend Mode removes a black background?
Lighten or Screen often works best for overlays with black backgrounds, depending on the colors and brightness of the clip.
Why can’t I see the Blend option?
The Blend option may be unavailable if the wrong clip is selected, the overlay isn’t on a separate track, or you’re using an older version of CapCut PC.
Can I use Blend Modes on images?
Yes. Blend Modes work with supported image overlays, including PNG, textures, logos, and other graphics placed above your main video.
Do Blend Modes reduce video quality?
No. Blend Modes only change how layers interact during editing. Your export quality depends on the settings you choose when exporting the final video.
Can I combine Blend Modes with Keyframes?
Yes. You can use Keyframes to animate overlays while applying a Blend Mode, creating smooth motion and more dynamic visual effects.
Are Blend Modes available on both Windows and Mac?
Yes. Blend Modes are available in CapCut PC for both Windows and macOS, although the interface may vary slightly between versions.
Which Blend Mode is best for cinematic videos?
Overlay and Soft Light are popular choices for cinematic edits because they enhance contrast and lighting while maintaining a natural look.
Can I change the opacity after applying a Blend Mode?
Yes. In fact, adjusting Opacity after selecting a Blend Mode is one of the best ways to fine tune the effect and achieve a balanced, professional looking result.

1 thought on “How to Use Blend Modes in CapCut PC (Complete Beginner’s Guide)”