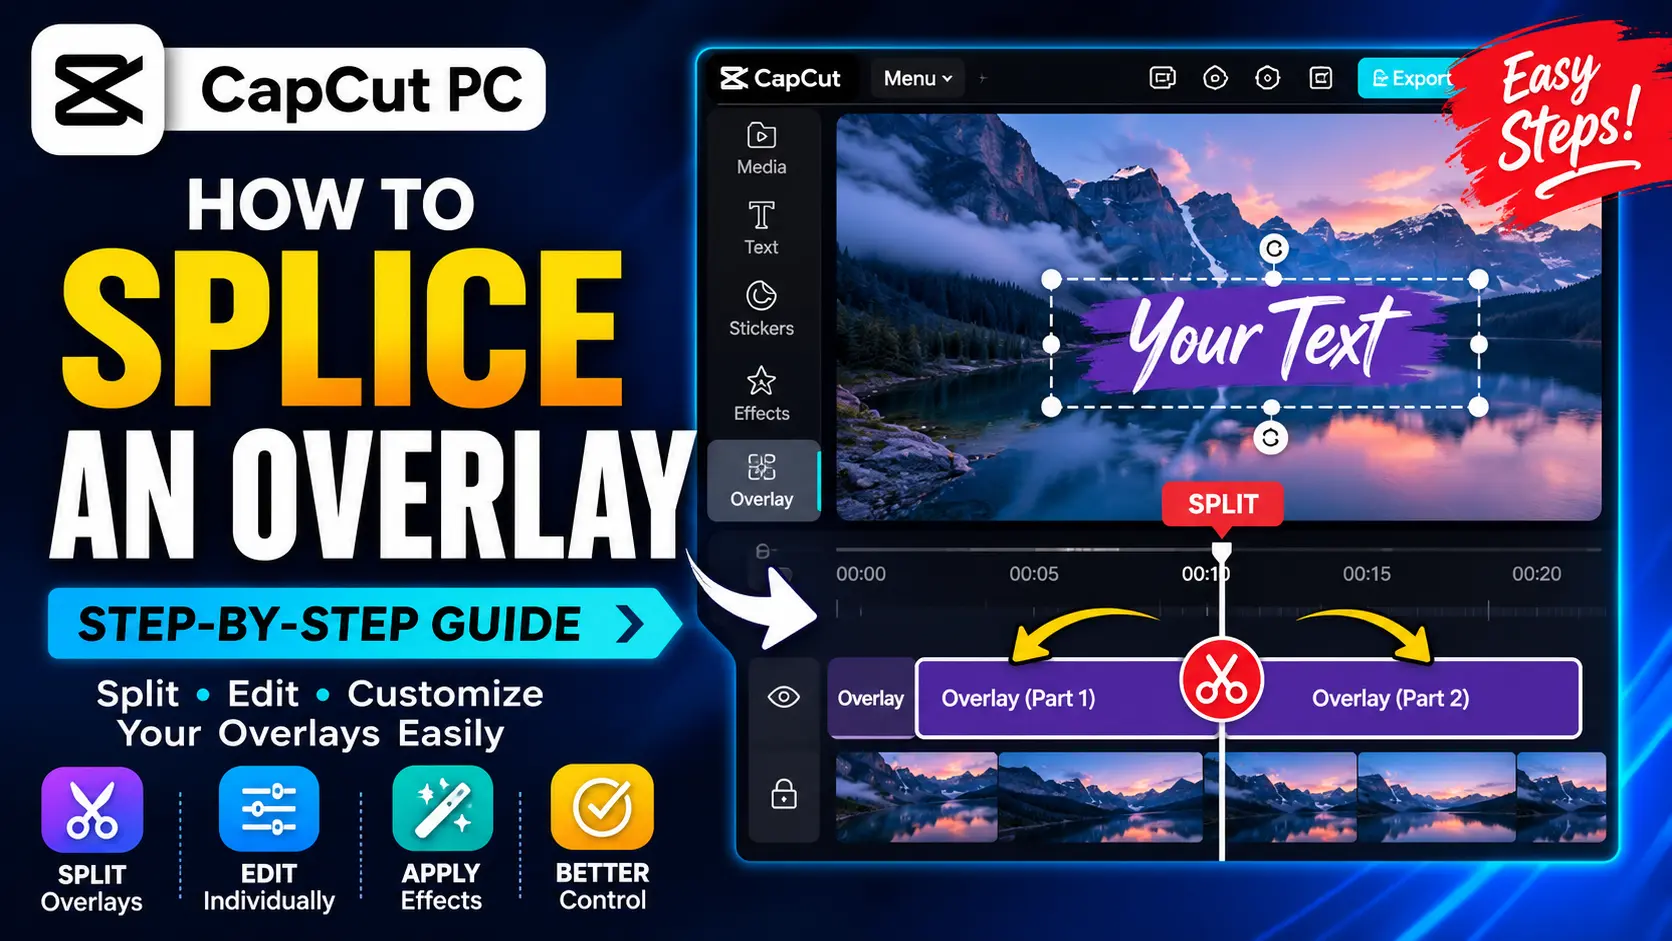
Splicing an overlay in CapCut PC means splitting an overlay clip into separate sections so you can edit each part independently. This lets you remove unwanted portions, apply different effects, adjust timing, or add animations without changing the main video. In this guide, you’ll learn exactly how to splice an overlay in CapCut PC, along with tips to avoid common mistakes and edit more efficiently.
🎬 What Does Splicing an Overlay Mean in CapCut PC?
Before you start editing, it’s helpful to understand what an overlay is and what “splicing” actually does. Knowing these basics will make it easier to follow the steps and edit your project with confidence.
🖼️ What Is an Overlay?
An overlay is any image, video, logo, sticker, or graphic placed on top of your main video. It appears on its own timeline track, allowing you to edit it separately from the primary footage.
For example, you can use an overlay to:
- Add a company logo or watermark
- Display subtitles or text graphics
- Insert picture in picture videos
- Show animated icons or effects
- Place decorative elements over your footage
Because overlays are independent layers, you can move, resize, rotate, animate, or remove them without affecting the original video.
✂️ What Does “Splice” Mean?
In video editing, splicing means splitting one clip into two or more separate clips at a specific point on the timeline. After the split, each section becomes its own editable clip.
For an overlay, splicing allows you to:
- Delete only part of the overlay.
- Change the overlay’s position at a certain point.
- Apply different effects, animations, or blend modes to each section.
- Adjust the overlay’s duration without changing the rest of the clip.
- Sync the overlay with music, dialogue, or scene changes.
This technique gives you much more control than editing the entire overlay as a single clip.
🎯 When Should You Splice an Overlay?
Splicing is useful whenever your overlay needs to behave differently during different parts of the video.
Common situations include:
- Removing an unwanted section of an overlay.
- Making an overlay appear or disappear at a specific time.
- Applying different visual effects to different segments.
- Changing the overlay’s opacity midway through a video.
- Creating smoother animations with keyframes.
- Matching overlays to scene cuts or music beats.
For example, if your logo should stay in the top right corner for the first 10 seconds and then move to the bottom left, splitting the overlay allows you to edit each segment independently instead of creating a new overlay from scratch.
💻 Before You Start
A few quick setup steps can make overlay editing much easier. Preparing your project properly helps you split clips accurately, avoid editing the wrong layer, and keep your timeline organized.
📥 Update CapCut to the Latest Version
Before editing, make sure you’re using the latest version of CapCut PC. New updates often include bug fixes, performance improvements, and interface changes that can affect editing tools like Split, Keyframes, and Blend Modes.
If you don’t see a feature shown in this guide, check whether your version of CapCut is up to date. Some tools may vary slightly between Windows and macOS, or between different software releases.
🎥 Import Your Main Video and Overlay
Open your project and import both the main video and the overlay you want to edit.
To add media:
- Open CapCut PC and create a new project.
- Click Import in the Media Library.
- Select your main video and overlay file.
- Drag both files onto the timeline.
Your overlay can be a:
- Video clip
- PNG image with a transparent background
- Logo or watermark
- GIF or animated graphic
- Sticker or visual effect
Once imported, place the main video on the primary track and the overlay on a separate track above it.
🎞️ Make Sure the Overlay Is on Its Own Track
An overlay should always be placed on its own timeline layer. This lets you edit or splice the overlay without changing the main video underneath.
A properly organized timeline might look like this:
| Track | Content |
|---|---|
| Track 2 | Overlay (logo, image, video, or graphic) |
| Track 1 | Main video |
Keeping overlays on separate tracks also makes it easier to:
- Select the correct clip.
- Apply effects to only the overlay.
- Adjust opacity or animations independently.
- Prevent accidental edits to your main footage.
🔍 Zoom In on the Timeline for Better Precision
A zoomed in timeline gives you more control when placing the playhead and splitting an overlay. This is especially helpful if you need to make edits at an exact frame or sync an overlay with dialogue, sound effects, or music.
To improve accuracy:
- Zoom in before making a split.
- Position the playhead exactly where you want to cut.
- Preview the frame before splitting.
- Zoom back out after finishing your edits.
Even a small timing error can make an overlay appear too early or too late, so taking a few seconds to zoom in can improve the final result.
✅ Check That the Overlay Is Selected
Before using the Split tool, click directly on the overlay clip in the timeline. The selected clip should be highlighted, indicating that any edits will apply only to that overlay.
If the main video is selected instead, CapCut will split the primary footage rather than the overlay. Checking your selection first helps prevent unnecessary edits and saves time during the editing process.
Now that your project is set up correctly, you’re ready to splice the overlay with precision and edit each section independently.
✂️ How to Splice an Overlay in CapCut PC
Now that your project is ready, you can split the overlay exactly where you need it. Splicing an overlay in CapCut PC takes only a few clicks and lets you edit each section independently without changing the main video.
📂 Step 1: Open Your Project
Launch CapCut PC and open the project containing your main video and overlay.
If you haven’t added an overlay yet:
- Click Import.
- Select your overlay file.
- Drag it onto a track above the main video.
Verify that the overlay sits on its own timeline track before continuing.
🖱️ Step 2: Select the Overlay Clip
Click the overlay on the timeline to select it.
A selected overlay will be highlighted, showing that any edits you make will apply only to that clip.
Before moving on, double check that:
- The overlay—not the main video—is selected.
- The correct timeline track is active.
- The overlay is unlocked if you’ve previously locked the track.
Selecting the wrong clip is one of the most common editing mistakes, so it’s worth confirming before you split.
🎯 Step 3: Move the Playhead to the Split Point
Drag the playhead (the vertical timeline indicator) to the exact frame where you want to splice the overlay.
For greater accuracy:
- Zoom in on the timeline.
- Preview the video before placing the playhead.
- Use frame by frame navigation if you need a precise cut.
For example, if you want a logo to disappear after five seconds, position the playhead at the five second mark.
✂️ Step 4: Split the Overlay
With the overlay selected and the playhead in position, use CapCut’s Split function.
Depending on your version of CapCut Desktop, you can usually split the clip by:
- Clicking the Split button above the timeline.
- Right clicking the overlay and selecting Split.
- Using the keyboard shortcut, if available for your operating system and CapCut version.
After splitting, the original overlay becomes two separate clips on the same track.
You can repeat this process as many times as needed to create multiple editable sections.
🎨 Step 5: Edit Each Overlay Segment Separately
Once the overlay has been split, each section can be edited independently. This gives you much more flexibility than working with a single overlay clip.
You can:
- Delete one section while keeping the others.
- Move an overlay segment to a different position.
- Resize or rotate only one part.
- Change the opacity for a specific section.
- Apply different animations or effects.
- Use different blend modes for individual segments.
- Add keyframes to create smooth motion.
For example, you could make an overlay fade in during the first clip, stay fully visible in the second, and fade out in the third—all without affecting the rest of the video.
▶️ Step 6: Preview Your Changes and Export
After editing the overlay segments, play the video from beginning to end to ensure everything is synchronized correctly.
Look for:
- Smooth transitions between overlay sections.
- Correct timing.
- Consistent positioning.
- No unwanted gaps or overlaps.
- Effects and animations working as expected.
If something doesn’t look right, move the playhead back to the affected section and make any necessary adjustments.
Once you’re satisfied with the results, export your project using your preferred resolution and frame rate. Reviewing the video before exporting helps catch small mistakes that are easier to fix in the editor than after rendering.
By following these steps, you can splice overlays with precision and create more polished videos in CapCut PC, whether you’re editing tutorials, social media content, presentations, or promotional videos.
🛠️ How to Edit Each Overlay Segment
After you splice an overlay, each segment becomes an independent clip on the timeline. This allows you to customize every part separately, giving you greater control over the timing, appearance, and movement of your overlay.
✂️ Trim Individual Overlay Segments
You don’t have to keep every split segment at its original length. After splicing, you can trim each overlay to control exactly when it appears and disappears.
To trim an overlay segment:
- Click the overlay segment you want to edit.
- Move your cursor to the beginning or end of the clip.
- Drag the edge inward or outward to shorten or extend its duration.
- Preview the timeline to ensure the timing looks natural.
Trimming is useful for removing unnecessary portions of an overlay or making it appear only during specific scenes.
📍 Move Overlay Segments on the Timeline
Each overlay segment can be repositioned independently after splitting.
Simply select the segment and drag it left or right on the timeline to change when it appears in your video.
Moving overlay segments is helpful when you need to:
- Sync graphics with spoken dialogue.
- Match overlays to scene changes.
- Align text with visual elements.
- Adjust timing after editing other clips.
Always preview the project after moving a segment to confirm it appears at the correct moment.
🎨 Apply Different Effects to Each Segment
One of the biggest advantages of splicing is that every overlay segment can have its own visual style.
For example, you can:
- Add a glow effect to the first segment.
- Apply a blur effect to the second.
- Use a color filter on the third.
- Remove effects entirely from another section.
This makes your edits more dynamic and prevents the overlay from looking identical throughout the entire video.
🌈 Change Blend Modes for Better Visual Results
Blend Modes determine how an overlay interacts with the video beneath it. Instead of displaying normally, the overlay can blend with the background to create different visual effects.
Depending on your project, you might use blend modes to:
- Create light or glow effects.
- Remove dark or bright backgrounds.
- Produce cinematic overlays.
- Improve the appearance of textures and graphics.
Choose the blend mode that best matches your footage, then preview the result before making additional edits.
If you’re new to this feature, check out our guide on How to Use Blend Modes in CapCut PC to learn what each blend mode does and when to use it.
🎯 Add Keyframes for Smooth Motion
After splitting an overlay, you can animate each segment independently using keyframes.
Keyframes allow you to change an overlay’s properties over time, such as:
- Position
- Scale
- Rotation
- Opacity
For example, one overlay segment can slide into the frame, while the next remains stationary before fading out.
Using keyframes after splicing gives you much more creative control over your animations.
👁️ Adjust Opacity for Individual Segments
Each overlay segment can have its own opacity setting.
Reducing opacity makes the overlay more transparent, while increasing it makes the overlay fully visible.
This is especially useful for:
- Watermarks
- Background textures
- Light leaks
- Decorative graphics
- Picture in picture videos
Different opacity levels across segments can create smoother visual transitions without adding extra effects.
✨ Add Separate Animations
CapCut lets you apply different animations to each overlay segment after splitting.
For example:
- The first segment can fade in.
- The second can zoom.
- The third can slide out.
Because each segment is independent, you can mix different entrance, combo, and exit animations to create more engaging videos.
Experiment with animation duration and timing to ensure each movement feels smooth and matches the pace of your project.
Editing overlay segments individually is one of the easiest ways to create professional looking videos in CapCut PC. Instead of treating the overlay as one long clip, you can customize every section to match your video’s flow and improve the overall viewing experience.
Explore more CapCut tutorials and editing tips on our homepage to learn additional techniques for creating polished videos.
⚠️ Common Problems When Splicing Overlays
Even though splicing an overlay in CapCut PC is straightforward, you may run into a few issues while editing. Most problems are easy to fix once you know what causes them. Here are the most common overlay splicing issues and their solutions.
❌ Split Button Is Missing
If you can’t find the Split button, the feature may be hidden because no clip is selected or your CapCut interface differs from the one shown in older tutorials.
Try these solutions:
- Click the overlay clip to select it.
- Move the playhead to the desired split point.
- Right click the overlay and look for Split.
- Check whether you’re using the latest version of CapCut PC.
- Expand your editing workspace if the toolbar is collapsed.
Interface layouts can change between software versions, but the split function remains available in supported desktop versions.
🎞️ The Overlay Can’t Be Selected
Sometimes clicking the overlay doesn’t select it, making it impossible to edit or split.
This usually happens when:
- Another clip is selected.
- The overlay track is locked.
- Multiple layers overlap in the timeline.
- You’re clicking the preview window instead of the timeline.
Zooming in on the timeline can make it easier to select smaller overlay clips accurately.
✂️ The Wrong Clip Gets Split
A common beginner mistake is splitting the main video instead of the overlay.
Before clicking Split, always check that:
- The overlay clip is highlighted.
- The playhead is positioned correctly.
- The correct timeline track is selected.
Taking a few seconds to confirm your selection can save you from unnecessary edits later.
🔍 The Timeline Is Too Zoomed Out
If the timeline is heavily zoomed out, it becomes difficult to place the playhead at the exact frame where you want to split.
To improve precision:
- Zoom in before making edits.
- Position the playhead frame by frame when necessary.
- Preview the video to verify the timing.
A closer timeline view helps you create cleaner, more accurate edits.
👻 The Overlay Disappears After Splitting
If an overlay seems to disappear after you splice it, the clip usually hasn’t been deleted. Instead, it may have been moved, trimmed too much, or become hidden beneath another layer.
Check the following:
- The overlay still exists on the timeline.
- Its visibility hasn’t been disabled.
- The duration wasn’t accidentally reduced to zero.
- The overlay hasn’t been dragged to another position.
- The opacity is set above 0%.
If the overlay is still present on the timeline, adjusting its position or duration often resolves the issue.
↩️ How to Undo an Accidental Split
Mistakes happen during editing, especially when working with multiple overlay clips.
If you split the wrong clip:
- Use the Undo command immediately.
- Restore the clip before making additional edits.
- Reposition the playhead and try again.
Undoing the action right away is much easier than manually rebuilding your timeline after several more edits.
💡 Tips to Prevent Overlay Editing Problems
Following a few simple habits can reduce mistakes and make editing more efficient.
| Best Practice | Why It Helps |
|---|---|
| Zoom in before splitting | Improves cutting accuracy. |
| Keep overlays on separate tracks | Prevents accidental edits to the main video. |
| Name important clips | Makes complex projects easier to manage. |
| Save your project regularly | Protects your work if the software closes unexpectedly. |
| Preview edits before exporting | Helps catch timing or positioning mistakes early. |
By understanding these common issues and their fixes, you can splice overlays more confidently and spend less time troubleshooting. Most problems come down to selecting the correct clip, placing the playhead accurately, and keeping your timeline organized.
✅ Tips for Cleaner Overlay Editing
Small editing habits can make a big difference in the final video. These practical tips will help you splice overlays more accurately, keep your timeline organized, and create professional looking results in CapCut PC.
🔎 Zoom In Before Splitting
Always zoom in on the timeline before making a split. A closer view lets you position the playhead more precisely, reducing the chance of cutting at the wrong frame.
This is especially useful when:
- Matching overlays to scene changes
- Syncing graphics with dialogue
- Editing short overlay clips
- Creating frame accurate animations
🎯 Use Timeline Markers as Reference Points
If your project contains multiple edits, adding markers can help you identify important moments before splitting an overlay.
Markers are useful for:
- Scene transitions
- Music beats
- Subtitle timing
- Logo appearances
- Animation start and end points
Planning your edits first makes the entire workflow faster and more consistent.
📂 Keep Overlays on Separate Tracks
Placing every overlay on its own track makes the timeline easier to manage.
This approach helps you:
- Select the correct clip quickly
- Avoid editing the main video by mistake
- Apply effects to individual overlays
- Move or trim overlays without affecting other elements
For larger projects with multiple graphics, separate tracks can save significant editing time.
📝 Rename Important Clips
As your project grows, generic file names like Overlay 1 or Video 3 become harder to identify.
Instead, use descriptive names such as:
- Company Logo
- Intro Animation
- Lower Third
- Subscribe Button
- Background Texture
Clear names make it easier to locate and edit the correct clip later.
👀 Preview After Every Major Edit
Don’t wait until the project is finished to review your work.
After splitting or moving an overlay:
- Play the edited section.
- Check that the timing feels natural.
- Look for unwanted gaps or overlaps.
- Confirm that animations and effects play smoothly.
Regular previews help you catch small mistakes before they become larger editing problems.
💾 Save Your Project Frequently
Although CapCut PC includes recovery features, saving your project regularly is still a good habit.
Create a new save point after completing major edits, such as:
- Splitting multiple overlays
- Applying animations
- Adjusting effects
- Rearranging the timeline
Keeping backup versions also makes it easier to return to an earlier stage if you decide to change your editing approach.
🎨 Maintain a Consistent Visual Style
If your video includes several overlay segments, try to keep the design consistent throughout the project.
For example, use the same:
- Font style for text overlays
- Color palette
- Animation speed
- Opacity levels
- Transition style
A consistent visual style helps your video look polished and professional while making it easier for viewers to follow the content.
⚡ Don’t Overuse Effects
Effects can improve an overlay, but adding too many can make your video look distracting.
Choose effects that support your content rather than compete with it. Simple fades, smooth motion, and clean transitions often produce better results than using multiple visual effects on every overlay.
By following these editing tips, you’ll not only splice overlays more accurately but also create videos that look cleaner, more organized, and easier to watch.
⌨️ Useful CapCut PC Keyboard Shortcuts
Learning a few keyboard shortcuts can make editing faster and more efficient. Instead of repeatedly clicking menus, you can perform common actions with a single key combination and keep your focus on the timeline.
Note: Keyboard shortcuts may vary slightly depending on your CapCut PC version and whether you’re using Windows or macOS. If a shortcut doesn’t work, check your version’s shortcut settings or use the corresponding toolbar option.
The table below highlights some of the most useful shortcuts for editing overlays and videos in CapCut PC.
| Action | Windows | macOS |
|---|---|---|
| Undo last action | Ctrl + Z | ⌘ + Z |
| Redo last action | Ctrl + Y (or Ctrl + Shift + Z in some versions) | ⌘ + Shift + Z |
| Delete selected clip | Delete | Delete |
| Copy selected clip | Ctrl + C | ⌘ + C |
| Paste clip | Ctrl + V | ⌘ + V |
| Cut clip | Ctrl + X | ⌘ + X |
| Select all clips | Ctrl + A | ⌘ + A |
| Save project | Ctrl + S | ⌘ + S |
| Zoom in on timeline | + (or mouse wheel, depending on settings) | + |
| Zoom out on timeline | – | – |
🚀 How Keyboard Shortcuts Improve Overlay Editing
Using shortcuts becomes especially helpful when you’re editing multiple overlay clips in the same project.
They can help you:
- Split and organize clips more efficiently.
- Undo editing mistakes instantly.
- Copy and duplicate overlay elements.
- Move through large projects faster.
- Reduce repetitive mouse movements.
- Maintain a smoother editing workflow.
For beginners, learning just a few basic shortcuts—such as Undo, Copy, Paste, and Save—can significantly improve editing speed.
⚠️ Why Might a Shortcut Not Work?
If a shortcut isn’t responding, the issue is usually related to your editing environment rather than the shortcut itself.
Check the following:
- The correct clip is selected.
- The CapCut editing window is active.
- Your keyboard layout hasn’t changed.
- You’re using a version of CapCut that supports the shortcut.
- Another application isn’t intercepting the same key combination.
If a shortcut still doesn’t work, you can always perform the same action using the toolbar or context menu.
Keyboard shortcuts aren’t required to splice overlays, but they can make the editing process much faster as you become more familiar with CapCut PC.
🔄 Overlay Editing vs. Splitting: What’s the Difference?
Many beginners confuse editing an overlay with splitting (or splicing) it. While both are common tasks in CapCut PC, they serve different purposes. Understanding the difference will help you choose the right tool and avoid unnecessary edits.
✂️ What Is Overlay Splitting?
Splitting creates two or more separate overlay clips from a single clip. Each new segment can then be edited independently.
For example, if you split a 10 second logo overlay at the 5 second mark, you’ll end up with two separate 5 second clips. You can delete one, move the other, or apply different effects to each segment.
Use splitting when you want to:
- Remove only part of an overlay.
- Apply different animations to different sections.
- Change the overlay’s position midway through the video.
- Add transitions between overlay segments.
- Edit specific portions without affecting the rest of the clip.
🎨 What Is Overlay Editing?
Overlay editing refers to modifying the appearance or behavior of an overlay without dividing it into separate clips.
Common overlay edits include:
- Resizing the overlay.
- Changing its position.
- Rotating it.
- Adjusting opacity.
- Applying filters or effects.
- Adding keyframes.
- Changing the blend mode.
These edits affect the selected overlay clip as a whole unless you’ve already split it into separate segments.
📊 Overlay Splitting vs. Overlay Editing
The table below highlights the key differences between the two editing methods.
| Feature | Overlay Splitting | Overlay Editing |
|---|---|---|
| Creates separate clips | ✅ Yes | ❌ No |
| Changes clip duration | ✅ Yes | ❌ Usually No |
| Allows different effects on each section | ✅ Yes | ❌ Applies to the whole clip |
| Removes part of an overlay | ✅ Yes | ❌ No |
| Changes size or position | ✅ After splitting | ✅ Yes |
| Supports independent animations | ✅ Yes | ❌ Not without splitting |
| Best for timeline control | ✅ Yes | ⚠️ Limited |
🎯 When Should You Split Instead of Edit?
Splitting is the better choice when different parts of the overlay need different settings.
For example, split the overlay if you want to:
- Show a logo only during the introduction.
- Move a graphic to another position halfway through the video.
- Apply one animation at the beginning and another at the end.
- Remove a section without deleting the entire overlay.
Editing alone won’t provide this level of control because the entire clip remains connected.
💡 When Is Editing Enough?
You don’t always need to split an overlay. Simple adjustments can often be made without creating multiple clips.
Editing is usually enough when you want to:
- Resize an overlay.
- Reposition it once.
- Change its opacity.
- Rotate it.
- Apply a single effect that lasts for the entire clip.
Keeping the overlay as one clip can make your timeline cleaner and easier to manage when no separate edits are needed.
Understanding the difference between splitting and editing helps you work more efficiently in CapCut PC. Split overlays when you need independent control over different sections, and use standard editing tools when the same changes apply to the entire clip.
🎯 Conclusion
Splicing an overlay in CapCut PC is an easy way to gain precise control over your edits. By splitting an overlay into separate clips, you can adjust timing, apply different effects, add animations, or remove sections without affecting the main video.
With the steps and tips in this guide, you can edit overlays more efficiently and create polished, professional looking videos in CapCut PC. For more editing techniques, explore our other CapCut tutorials to continue improving your workflow.
❓ FAQs
If you still have questions about splicing overlays in CapCut PC, the answers below cover some of the most common concerns from beginners and experienced editors alike.
Can I splice multiple overlays at the same time?
No. In most versions of CapCut PC, you need to split each overlay clip individually. This gives you precise control over the timing and edits for every overlay.
Does splitting an overlay reduce video quality?
No. Splitting an overlay only divides the clip on the timeline. It does not reduce the quality of the original media or the exported video.
Can I undo a splice in CapCut?
Yes. If you accidentally split the wrong clip, use the Undo command immediately. If you’ve already made additional edits, you may need to manually delete or reposition the split segments.
How do I cut only the overlay and not the main video?
Select the overlay clip before using the Split tool. If the main video is selected instead, CapCut will split the primary footage rather than the overlay.
Why can’t I split my overlay clip?
This usually happens because the overlay isn’t selected, the playhead isn’t positioned on the clip, or the timeline track is locked. Selecting the correct overlay and unlocking the track typically resolves the issue.
Can I apply different effects after splitting an overlay?
Yes. Once you’ve split an overlay, each segment becomes an independent clip. You can apply different effects, animations, blend modes, or opacity settings to each section.
Is overlay splicing available on both Windows and Mac?
Yes. CapCut PC supports overlay editing on both Windows and macOS. However, the interface and available features may vary slightly depending on your operating system and CapCut version.
Can I split an image overlay as well as a video overlay?
Yes. CapCut lets you split both image and video overlays, provided the overlay has a duration on the timeline. After splitting, each segment can be edited separately.
Can I add transitions after splitting an overlay?
Yes. After splitting an overlay into multiple segments, you can add transitions between those segments if your version of CapCut PC supports transitions for overlay tracks.
What’s the difference between splitting and trimming an overlay?
Splitting creates separate overlay clips, while trimming changes the length of a single clip without creating additional segments. Use splitting when you need independent edits and trimming when you only want to shorten or extend the overlay.
1 thought on “How to Splice an Overlay in CapCut PC (Easy Step by Step Guide)”